Saturday 8 August 2015

Flour Resist with Dye and Fabric Inks

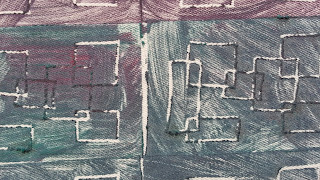
I've been getting interested in resists and tried out flour paste as a means to enhance printing and dyeing.

It's quite easy but takes a bit of time.

Pin out a piece of cloth onto a sheet of plastic and onto something with give (I used a scrap of carpet underlay) - as the cloth dries it will shrink so the 'give' is important

Mix 1:1 flour and water - it should drip out in a solid fast drip as per the picture

I spread the mix out with the back of a spoon

Some tools to mark make  

I wrote out some words with a kebab stick

Some more mark making with a cookie cutter

Drying out in the airing cupboard - beware, the smell of the flour mix will linger for months after

When the paste is dry it has a kind of sheen on it

Detail of the dried marks

You can see the curvatures of the shrinkage and how it tugs at the pins

Detail of the marks

Scrunch up the cloth

Cloth after scrunching - brush away the 'crumbs'

I used fabric paint with a brush, really pushing it into the cracks

The back of the cloth once painting has started (I should have put a protective piece of plastic on the table)

This is the same but with dyes

The dyed piece ready for drying and batching

The dried fabric painted cloth - I have started crumbling off the flour

Flour mostly removed

Detail of the cloth - I've left little bits of the flour for texture

I tried removing the flour by washing instead with the dyed piece but it gets very 'gluey'

The finished dyed piece has some delicate colouring

The finished painted pieces - front and back

Beware of flushing the flour mix crumbs down your sink or in your washing machine as it could block your drains.

I found the results really interesting and have used one piece already to resolve.

Here are some other things you can do with flour resist:

Leslie Tucker Jenison Flour Paste Resist turorial

Maree Martin on YouTube

Jamie Kalvesrtan Design

Jane La Fazio


Saturday 1 August 2015

Another Visual Exercise


The goal is to "explore the possibilities of stamping as a design tool."

Simply cut one lino block a day for 30 days. Or, if you can't wait, cut six in one go for five days. Then print, print, print.

They suggest using rubber erasers. I bought some 'soft lino' which is essentially a rather slim piece of rubber which is indeed very easy to cut into. A pleasure compared to real lino although the deeper you go and the nearer the sides the less sharp is the edge of the cut. Or perhaps that's just my tools.

Here's how it went for me:

Penciling in a pattern

The pattern cut - you can see how the edges 'fray' in this lino; this was happening when I was going over a previous cut with a deeper one - this lino doesn't like it

Cutting the lino

I had some plain acrylic paints and rollers from way back and decided to try out some samples.

Inking up a perspex plate

First impressions

The inking plate after an impression

First results - the orange block here has a full border and a lot of positive

Immediately soaking the blocks - acrylics dry really quickly

The next colour and some other tools to make impressions

Second sample

I also tried some out on fabric in my class.

Hodge podge of prints (this includes impressions from some screens as well as the blocks)

One block in a small range of colours

Detail - I love the painterly effect of brushing on the colour instead of impressing it


I veered noticeably towards the blocks that had less positive carved into them. This made me realise how many of the blocks I'd made with too little negative and full sharp borders making them heavy and 'blocky'. The full borders are much harder to line up than blocks that don't have borders.

So I started to reverse some of the blocks I'd made.

Two versions of the same pattern - positive and negative

And made some blocks that were all borderless and mostly negative.


Some more samples:

The green block is printed out three times left to right before re-inking therefore getting fainter each time

I also made a traditional lino cut which I overlaid on my soft lino block (printing out four times top to bottom). I love the surface quality of the leaves (plus they look so 'tumbly')

So far I haven't quite cut 30 blocks. I started out well, with a couple of consecutive days of 6 each time but then fizzled a bit. I'm finding it hard to come up with motif ideas. Partly because I'm restraining myself instead of letting loose on the lino. One evening I decided to get really angry and do whatever even if it meant slashing the lino to bits. And even though there was no-one watching I just couldn't!

So this is where Slasher Frankie has got to:

22 blocks

If you fancy taking this to another level then how about designing and printing a half drop repeating pattern?